Activate the Remote Desktop Services license server
Applies to: Windows Server 2022, Windows Server 2019, Windows Server 2016
The Remote Desktop Services license server issues client access licenses (CALs) to users and devices when they access the RD Session Host. You can activate the license server by using the Remote Desktop Licensing Manager.
Install the RD licensing role
- Sign into the server you want to use as the license server using an administrator account.
- In Server Manager, select Manage > Add Roles and Features.
- On the Select installation type page, select Role-based or feature-based installation.
- Specify the server on which you'll install the licensing role.
- On the Server Roles page, check the box for Remote Desktop Services, then select Next until you see the Remote Desktop Services page.
- Select the roles you want to install. Make sure you include the Remote Desktop Licensing role.
- In the Add Roles and Features Wizard dialog box, select Add Features.
- Select Next until you see the Confirmation page, then select Install.
- In Server Manager, select Remote Desktop Services > Servers. Right-click the server where you installed the Remote Desktop Licensing role and select RD Licensing Manager.
- In the RD Licensing Manager, select the server, and then select Action > Activate Server.
- Accept the remaining default values in the Activate Server Wizard until you see the Company information page, then enter your company information.
- Accept the defaults for the remaining pages until the final page. Clear Start Install Licenses Wizard now, and then select Finish.
- Select Action > Review Configuration > Add to Group > OK and enter credentials for a user in the AAD DC Administrators group, and register as SCP. This step might not work if you are using Microsoft Entra Domain Services, but you can ignore any warnings or errors.
Install RDS client access licenses on the Remote Desktop license server
- On the license server (usually the first RD Connection Broker), open the Remote Desktop Licensing Manager.
- Right-click the license server, and then click Install licenses.
- Click Next on the welcome page.
- Select the program you purchased your RDS CALs from, and then click Next. If you are a service provider, select Service Provider License Agreement.
- Enter the information for your license program. In most cases, this will be the license code or an agreement number, but this varies depending on the license program you're using.
- Click Next.
- Select the product version, license type, and number of licenses for your environment, and then click Next. The license manager contacts the Microsoft Clearinghouse to validate and retrieve your licenses.
- Click Finish to complete the process.
License Remote Desktop session hosts
To install licenses for your session hosts, you'll need a Remote Desktop license server with per-user or per-device client access licenses (CALs) activated.
Configure licensing for an RDS deployment that includes the RD Connection Broker role
If you need to license session hosts where your RDS deployment doesn't include the connection broker role, you'll need to specify a license server by using group policy either centrally from your Active Directory domain or locally on each session host. You'll also need to do specify a license server when using Windows Server with Azure Virtual Desktop.
To specify a license server:
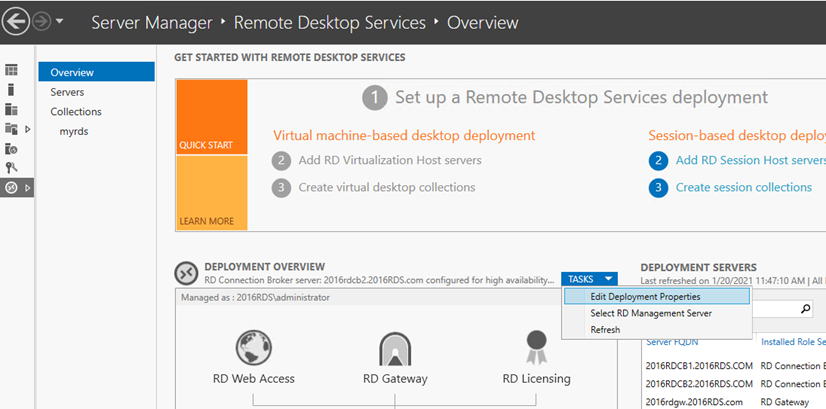
On the RD Connection Broker computer, open Server Manager.
In Server Manager, select Remote Desktop Services > Overview > Edit Deployment Properties > RD Licensing.
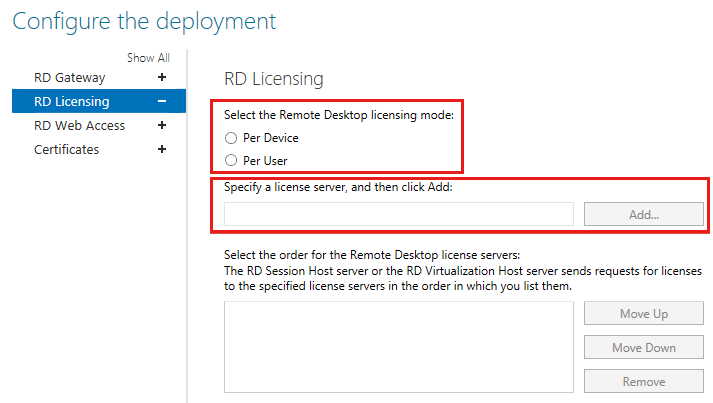
Select the Remote Desktop licensing mode (either Per User or Per Device, as appropriate for your deployment).
Note:
If you use domain-joined servers for your RDS deployment, you can use both Per User and Per Device CALs. If you use workgroup servers for your RDS deployment, you have to use Per Device CALs In that case, Per User CALs are not permitted.
Specify a license server, and then select Add.
Configure licensing for an RDS deployment that includes only the RD Session Host role and the RD Licensing role
Depending on whether you want to configure Group Policy centrally from your domain or locally on each session host:
Open the Group Policy Management Console (GPMC) and create or edit a policy that targets your session hosts.
Open the Local Group Policy Editor on the session host.
Go to Computer Configuration > Administrative Templates > Windows Components > Remote Desktop Services > Remote Desktop Session Host > Licensing.

In the policy list, right-click Use the specified Remote Desktop license servers, and then select Properties.
Select Enabled, and then enter the name of the license server under License servers to use. If you have more than one license server, use commas to separate their names.
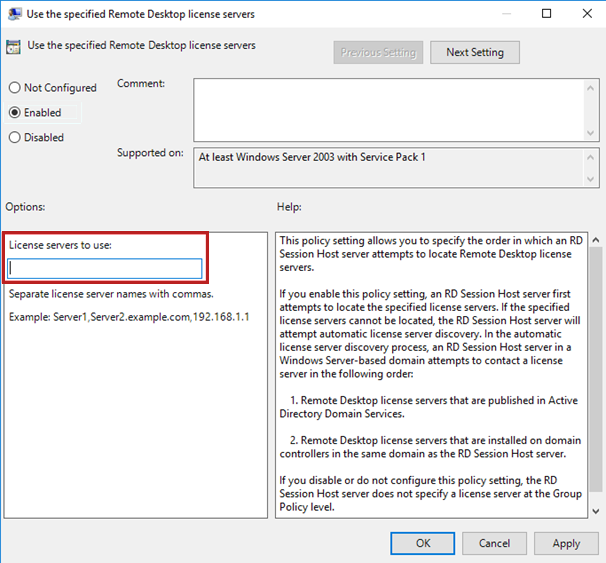
Select OK.
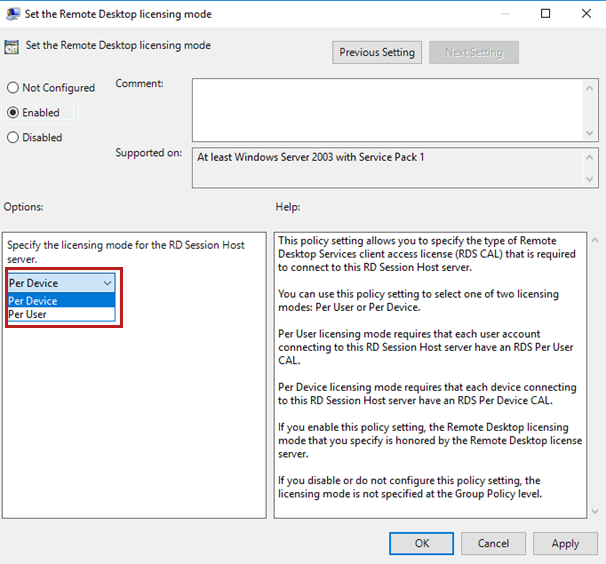
In the policy list, right-click Set the Remote Desktop licensing mode, and then select Properties.
Select Enabled.
Under Specify the licensing mode for the Remote Desktop Session Host server, select Per Device or Per User, as appropriate for your deployment.
Comments
Post a Comment