
Disable the Password Expiration Policy in Windows Server


How to Disable the Password Expiration Policy in Windows Server?

Security is the big concern everyone considers while securing the windows server. The Windows team is trying to add and modify new security features for the users and the groups. Once in a while, changing Passwords is a general practice every administrator recommends performing for every other user created on the server (We do actually, aren’t you?).

So, while creating a user account on the windows server, you will already have an un-checked box for Password never expires. This feature, by default, forces the users to change their Password after 45 days (the default value can be changed). In this article, we will demonstrate the step-by-step guide on how to disable the password expiration policy on a Windows server.


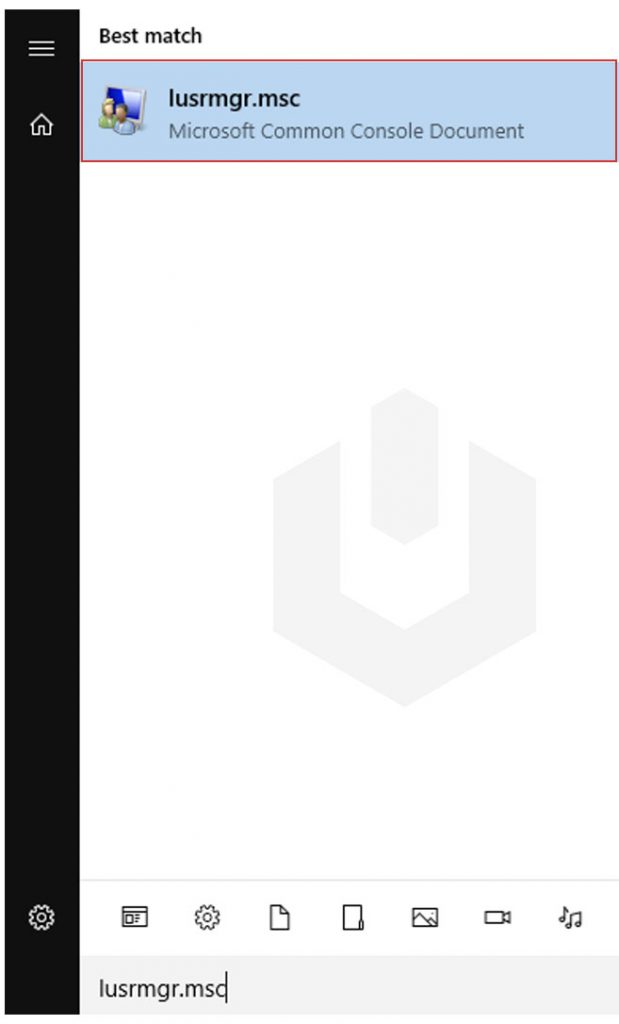
1. Login to Windows Server → Search and Open lusrmgr.msc.

search and open lusrmgr msc

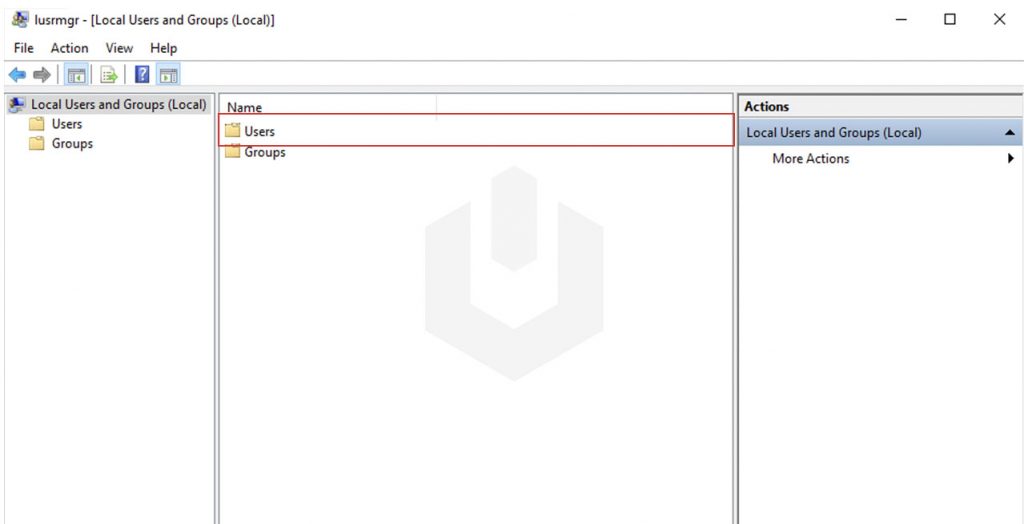
2. Navigate to Users.

navigate to users lusrmgr msc

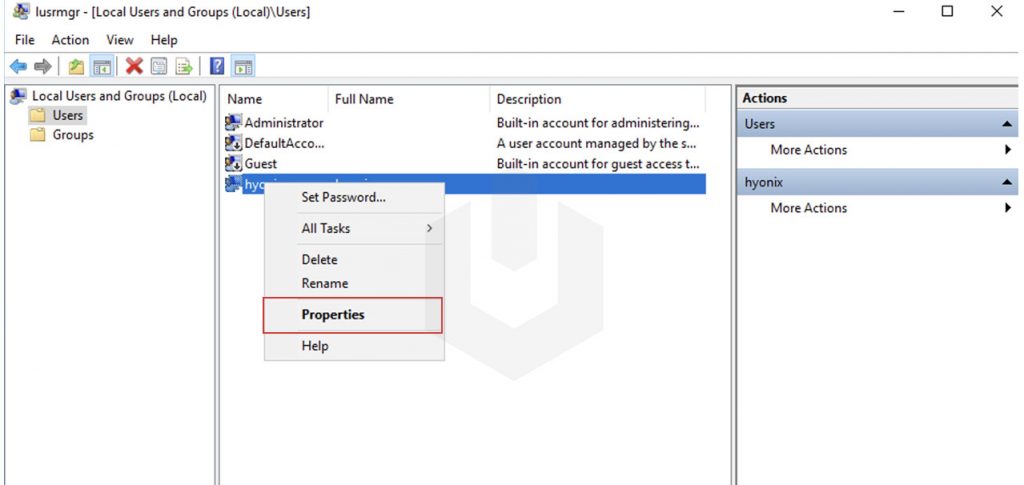
3. Here, you have a list of users. Select and Right-click on the User → Click on the Properties.

click on properties user lsusrmgr

4. Now, check the box Password never expires.

password never expires lsusrmgr user

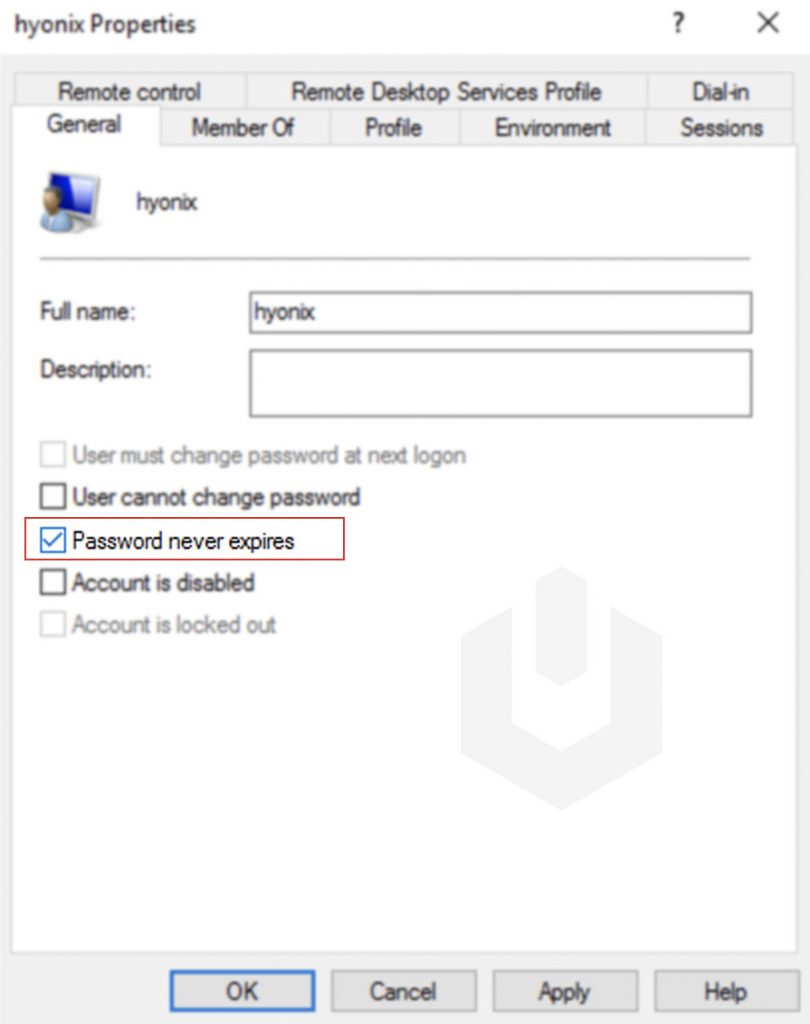
5. Finally, click on Apply → OK.

How to Disable the Password Expiration in Windows Server

Comments

Popular posts from this blog

Two simple ways to block internet browsing using Windows Firewall.

  Here are two simple ways to block internet browsing using Windows Firewall. Choose Method A (Block all browsers) or Method B (Block specific browsers like Chrome/Edge/Firefox). ✅ METHOD A — BLOCK ALL INTERNET BROWSING (Recommended) This blocks ALL internet access for ALL applications except those you allow. Steps: Press Windows + R Type: wf.msc Press Enter On the left, click Outbound Rules On the right, click New Rule… Select Custom → Next Under Program , choose All programs → Next Under Protocol and Ports , click Next Under Scope , click Next Under Action , select: ✔ Block the connection Click Next Under Profile , select: ✔ Domain ✔ Private ✔ Public Click Next Name the rule: Block Internet Browsing Click Finish ✔ This will instantly disable ALL internet access. 🟨 OPTIONAL: Allow exceptions If you want to allow EXCEPTIONS (example: allow only MT5, or allow Windows Update): Create a New Outbound Rule Select Program Browse to the app...

Block Browser Using Software Restriction Policy

Here are several alternative ways to block web browsers in Windows (Chrome, Edge, Firefox, etc.) without using the firewall method you mentioned earlier . Choose the method that best fits your need. 1 . Block Browser Using AppLocker (Windows Pro/Enterprise) Blocks the browser application from opening completely. Steps: Press Win + R , type: secpol.msc Go to: Application Control Policies → AppLocker → Executable Rules Right-click → Create New Rule Select: Deny User = Standard user (not Admin) Choose Path : Chrome: C:\Program Files\Google\Chrome\Application\chrome.exe Edge: C:\Program Files (x86)\Microsoft\Edge\Application\msedge.exe Firefox: C:\Program Files\Mozilla Firefox\firefox.exe Apply. Result: User cannot open the browser. Admin still can. 2 . Block Browser Using Software Restriction Policy For Windows Pro. Steps: Press Win + R , type: gpedit.msc Navigate to: Computer Configuration → Windows Settings → Security Settings → Soft...

How to connect your Website domain name to a Cloud VPS hosting environment running XAMPP

To connect your Website domain name to a Cloud VPS hosting environment running XAMPP, follow these steps: Obtain Your VPS IP Address : Log in to your Contabo account and navigate to your VPS management section to find your server's public IP address. Configure Your Domain's DNS Settings : Access your domain registrar's control panel. Locate the DNS management section. Create an 'A' record pointing your domain (e.g., yourdomain.com ) to your VPS's public IP address. If you want ' www.yourdomain.com ' to also point to your VPS, add a 'CNAME' record for 'www' pointing to 'yourdomain.com'. Set Up Virtual Hosts in XAMPP : On your VPS, open the httpd-vhosts.conf file located at C:\xampp\apache\conf\extra\httpd-vhosts.conf . Add the following configuration, replacing placeholders with your actual domain and directory paths: <VirtualHost *:80> ServerAdmin [email protected] DocumentRoot "C:/xampp/ht...