Preparations for Cloning C Drive
Before proceeding to the steps of cloning the C drive to an SSD, you should pay attention to following aspects.
1. The new SSD has enough storage space.
It is important to make sure the target SSD has sufficient storage space to receive all data on your C drive, for the cloning C drive process will create an exact copy of installed Windows 10 operating system, applications, and data. If the SSD is not large enough, you should consider cleaning up unnecessary files from the C drive in advance, or you are likely to face low disk space issue on the new SSD.
If the target SSD contains files, please also make sure these files have been backed up to somewhere else. That's because everything on the target SSD will be removed during the C drive cloning process.
2. Properly connect the SSD to your computer.
You can connect the new SSD to your computer using a USB-to-SATA cable or SSD-to-USB adapter, depending on whether your SSD is internal or external. Just ensure the SSD can be recognized correctly.
3. Free download, install and launch the C drive cloning software.
It is often easier and more reliable to use a third-party disk cloning program to clone the C drive and operating system to another drive in Windows 11/10/8/7. DiskGenius Free Edition is the recommended option, as it offers various free features regarding data backup, for example,
- Migrate Windows operating system to a hard drive, SSD, or USB drive.
- Transfer Windows operating system to VMware or VirtualBox virtual machine.
- Clone a larger disk to a smaller one by way of files, sectors or file system structures.
- Clone a partition to another by way of files, sectors or file system structures.
- Clone a hard drive that has bad sectors, allowing to skip bad sectors.
- Back up any partition into an image fille and support incremental backup.
- Back up an entire hard drive into an image file.
The following two guides show you how to clone the C drive to an SSD or other devices using this free cloning software.
Method 1. Use the "System Migration" Feature to Migrate C Drive and OS
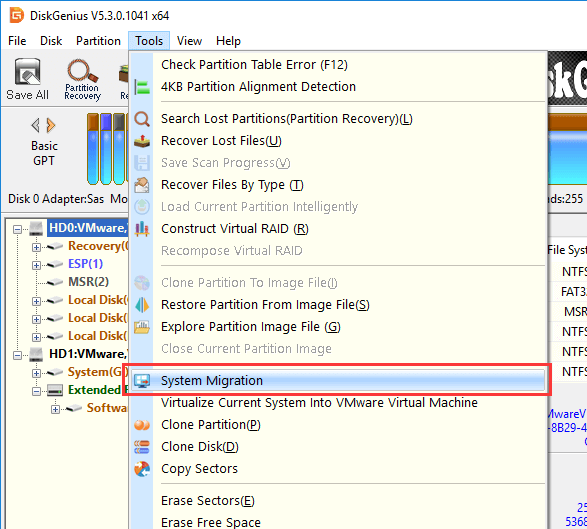
Step 1. Once the DiskGenius Free Edition is installed and launched, check if the target SSD is detected in the software. Then click "Tools" – "System Migration".
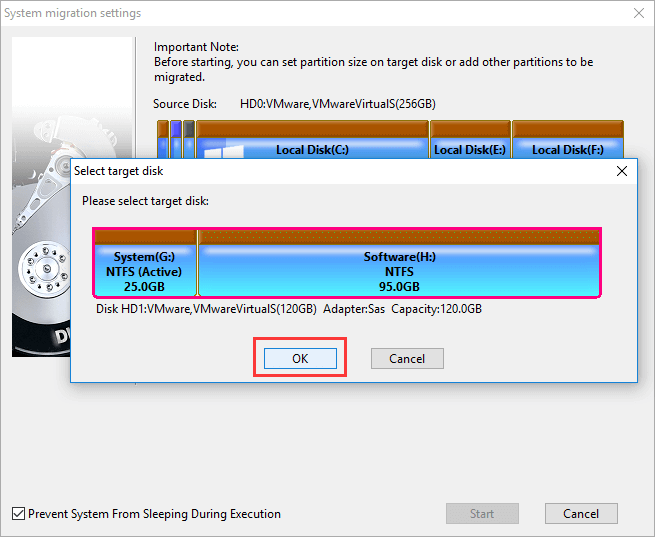
Step 2. Select the destination disk and click "OK".
This window will present you with all disks except for the system drive, and you should choose the correct one.
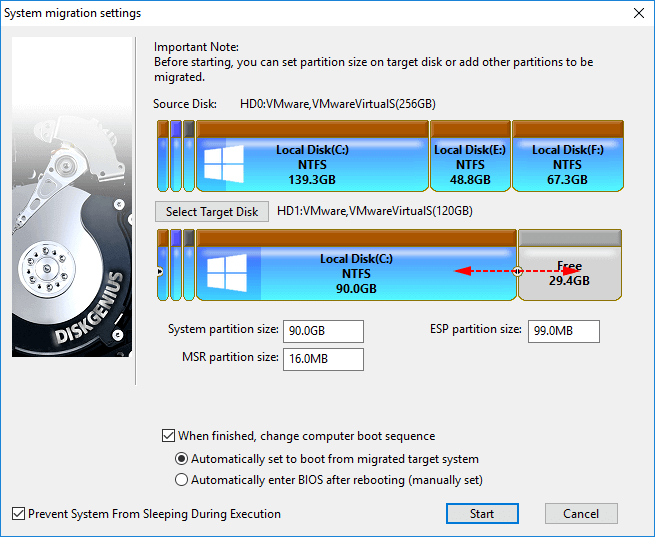
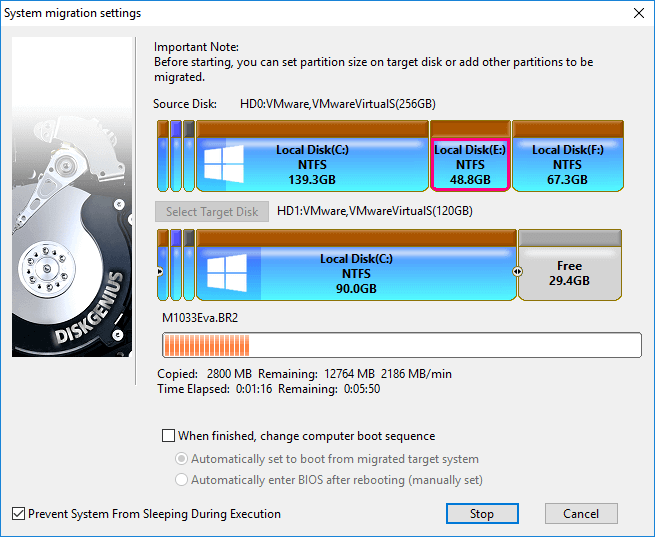
Step 3. Click "Start" button after making sure all settings are correct.
There might be other partitions on the original disk except for the C drive, and you can decide whether to clone all of them. If necessary, you can set the C drive size on the new SSD. Also, you can choose whether to change boot sequence automatically.
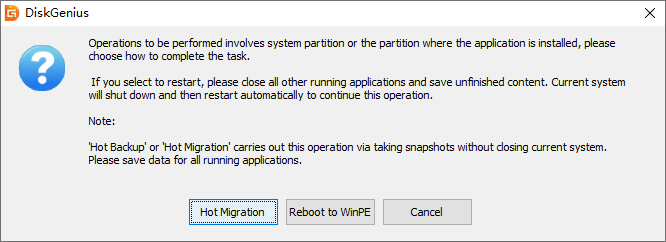
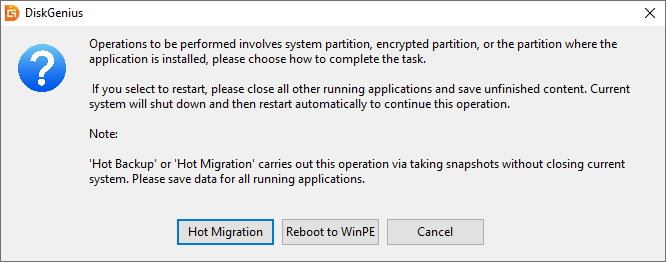
Step 4. Choose the cloning method between "Hot Migration" and "Reboot to WinPE".
Step 5. Wait for the cloning process to finish on its own. After the cloning process gets done, you will receive a message box displaying a confirmation message.
Here is the video guide of migrating Windows 10 to an SSD:
Method 2. Use the Disk Cloning Feature to Transfer C Drive
In addition to the "System Migration" feature, you can also achieve the C drive cloning using the "Clone Disk" feature which is also available for the DiskGenius Free Edition. The "Clone Disk" feature can not only clone the disk where Windows is installed, but also clone other hard drives, SSDs, USB flash drives, SD cards, virtual disks, etc. Here are the steps to clone the system disk to an SSD.
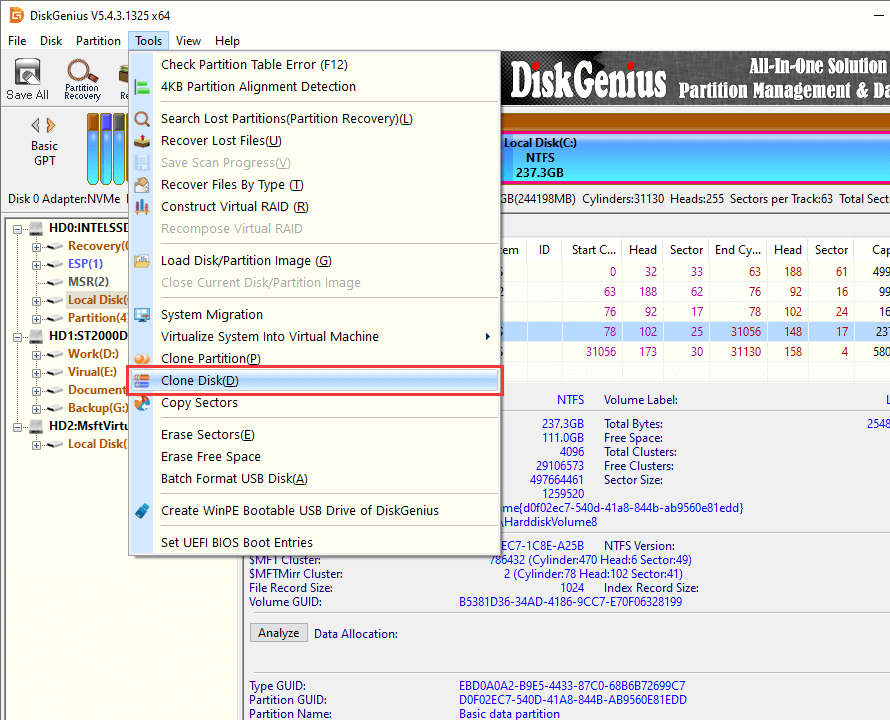
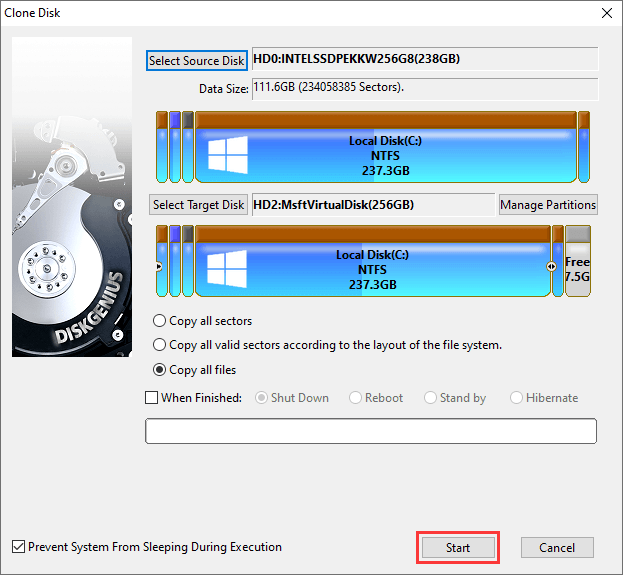
Step 1. Click "Tools" – "Clone Disk".
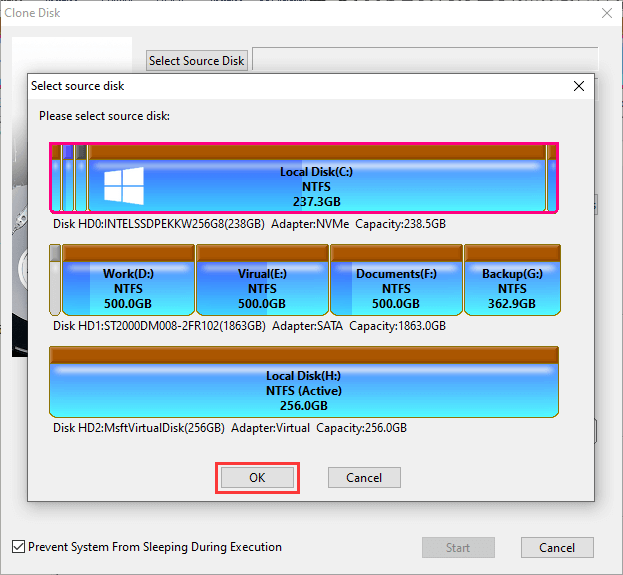
Step 2. Select the source disk and click "OK" button.
The source disk should be the one where your C drive is located, see the picture below:
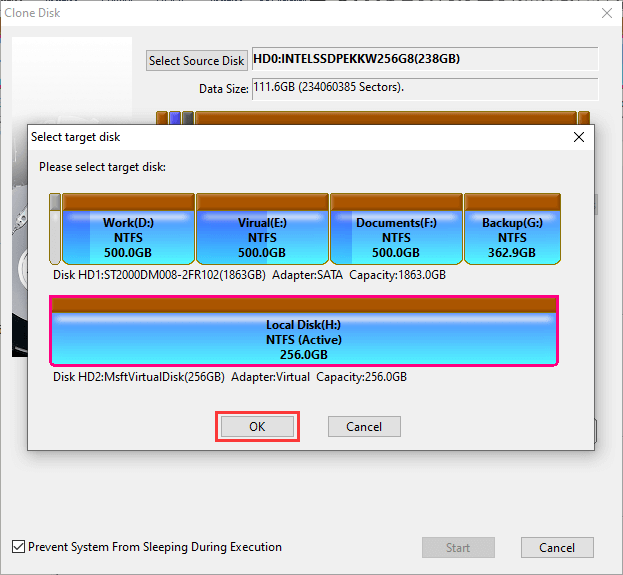
Step 3. Select destination disk and click "OK".
Select the hard drive or SSD that prepares to receive the C drive as the target disk. Make sure you choose the correct drive.
Step 4. Configure cloning options and click "Start" button.
Before clicking the "Start" button, you can set some options for the drive cloning, for example,
Partitions to be cloned: In general, all partitions of the original hard drive will be cloned to the target hard drive or SSD. Since your aim is to clone C drive, you can exclude those partitions that you don't want to have on the target disk.
Partition size on the target disk: You can choose to extend or shrink the size of the C drive on the target disk as needed.
Clone method: Three methods are available for different purposes, and you can choose the one based on your requirements.
Step 5. Choose "Hot Migration", and the software will clone C drive to the new SSD without closing current system.
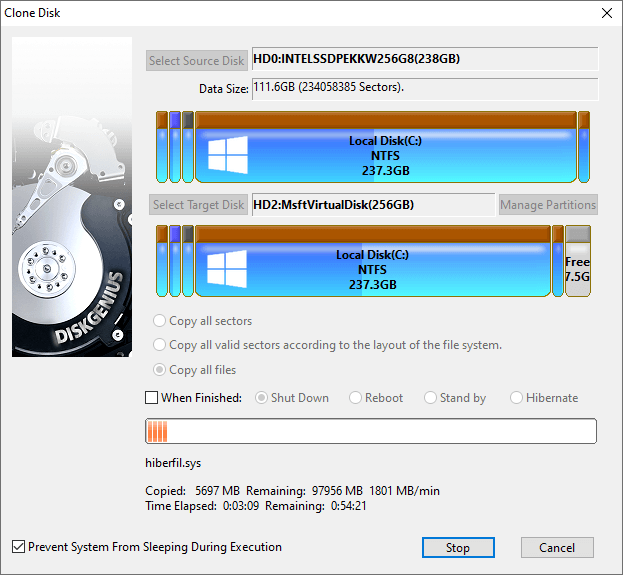
Step 6. Let the cloning process finish.
Comments
Post a Comment