
Just simply follow the steps.
Step 1:
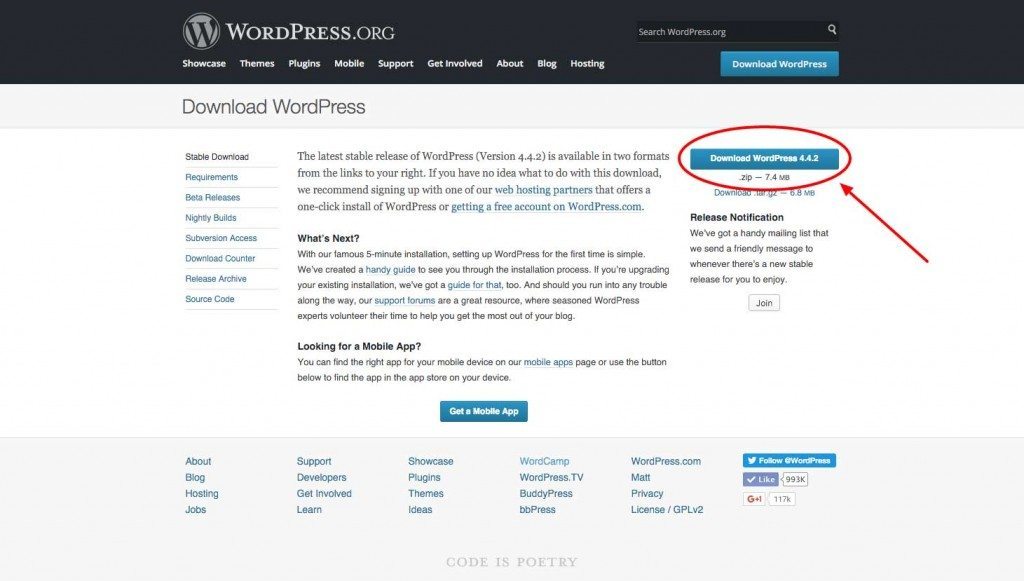
Download the most recent version of WordPress to a location of your choice at WordPress.org
Step 2:
Upload and extract the WordPress .ZIP file to your desired installation directory.
Okay so at this point I am assuming that you already have a hosting provider using cPanel and that you have already created an Add-On Domain or Subdirectory.
Within the File Manager, locate and navigate to that directory. From the top toolbar of the cPanel, select “Upload” and browse for the file you downloaded from WordPress.org. Once the .ZIP file has finished uploading, return to the directory by clicking the “← Go Back to “/home/yourserverhere/public_html/yoursitehere” link.
Within the directory root you will now see the wordpress.zip file. Click on this file to select it and then from the cPanel tool bar at the top, click “extract”. After that click “reload” in the cPanel toolbar and you will see the extracted wordpress folder. You can now delete the .ZIP file in order to keep everything nice and clean.
Step 3:
Move files from the wordpress folder back into the directory root.
Double click on the newly extracted “wordpress” folder and you should now see all the WordPress files. From the cPanel toolbar, click on the box “Select All”. All of the WordPress files should now be highlighted. In the cPanel toolbar select “Move File” and a modal will pop up with a directory link “/public_html/yourdirectoryname/wordpress”. Remove the “/wordpress” tail from the end of the path and click Move File(s). All files should now be moved to your directory root and click “Up One Level” from the toolbar to view them.
Step 4:
Create a database and database user
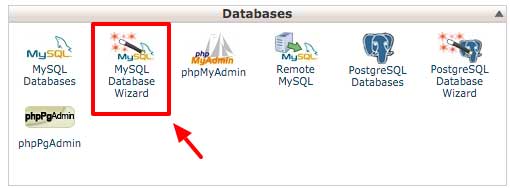
We have finished the initial steps and now it’s time to setup the database that will power your website. Navigate to your cPanel’s main dashboard and locate/click the icon “MySQL Database Wizard”.
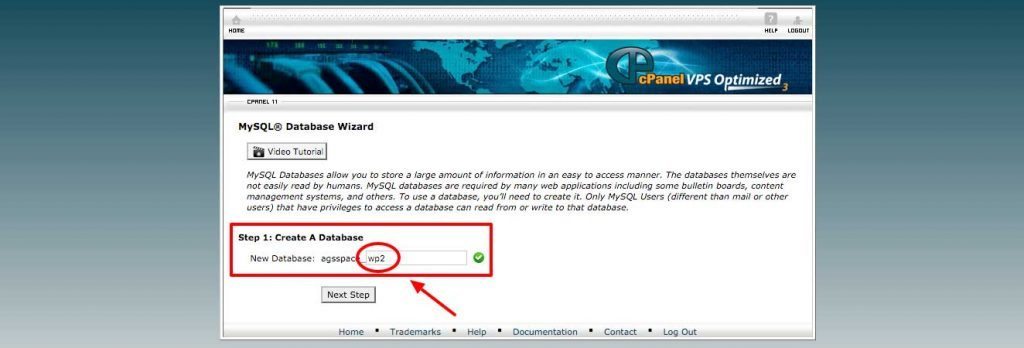
Once inside the Database Wizard you will be prompted to create a New Database. Your database prefix will appear followed by an underscore and a blank area for you to populate your database name “yourserver_blankarea“. In the blank area you will enter your database name and keep it in a safe spot for a future step. The database name should be at least 3 characters and only contain alphanumeric characters. After filling in the name click “next step”.
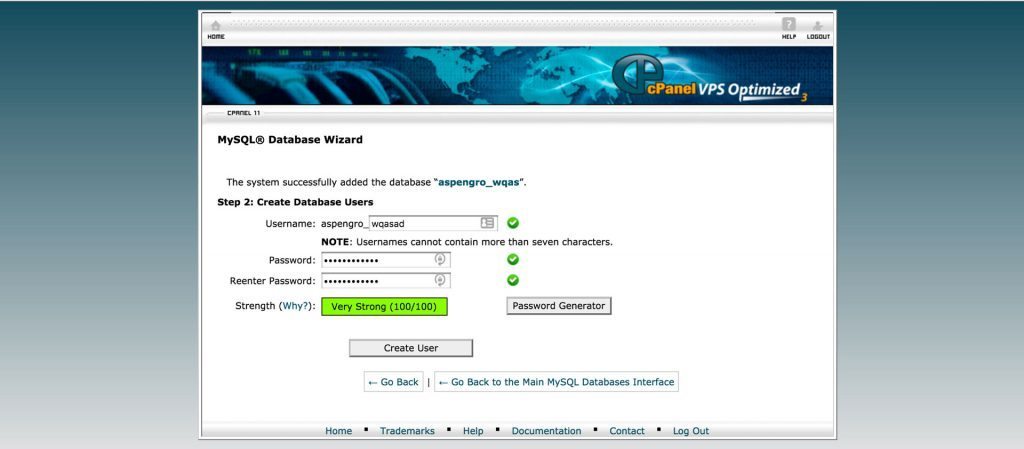
You will now be prompted to create a Database User. Your database prefix will appear again followed by an underscore and a blank area for you to populate your database username “yourserver_username“. The database username cannot contain more than seven alphanumeric characters. Save the username to a safe location for future use. Now either manually enter a password of your choice or use the provided “Password Generator”… just make sure that your password is strong and secure. Now click on the button “Create User”.
Now that you have created the Database User, you will be brought to a page that asks you to assign privileges. Tick the box at the top that reads “All Privileges” and then click the button “Next Step”. Your database is now set up and you can now move on to plugging the database information into the wp-config.php file.
Step 5:
Populate the wp-config.php file with your database information
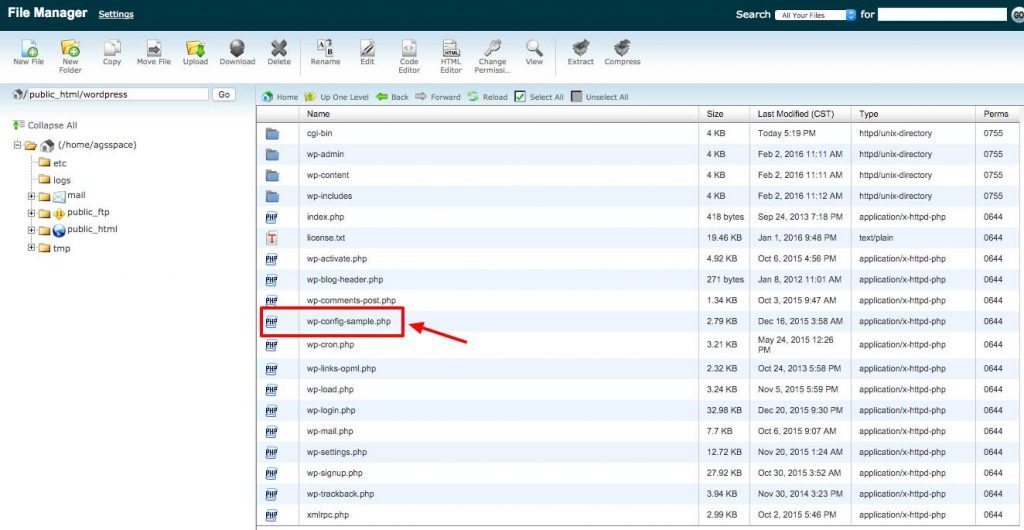
Okay now it is time to navigate back to the proper directory in the file manager with your database information handy. In your site’s directory root, locate the file named “wp-config-sample.php“. Click on this file and then select “Code Editor” from the top toolbar, click “Edit” and open the .php file.
Now that the wp-config-sample.php file is open in the Code Editor, it is time to start adding your database information…
Locate the line that reads “define(‘DB_NAME‘, ‘database_name_here‘);” and add your database name.
Locate the line that reads “define(‘DB_USER‘, ‘username_here‘);” and add your database username.
Locate the line that reads “define(‘DB_PASSWORD‘, ‘password_here‘);” and add your database password.
Step 6:
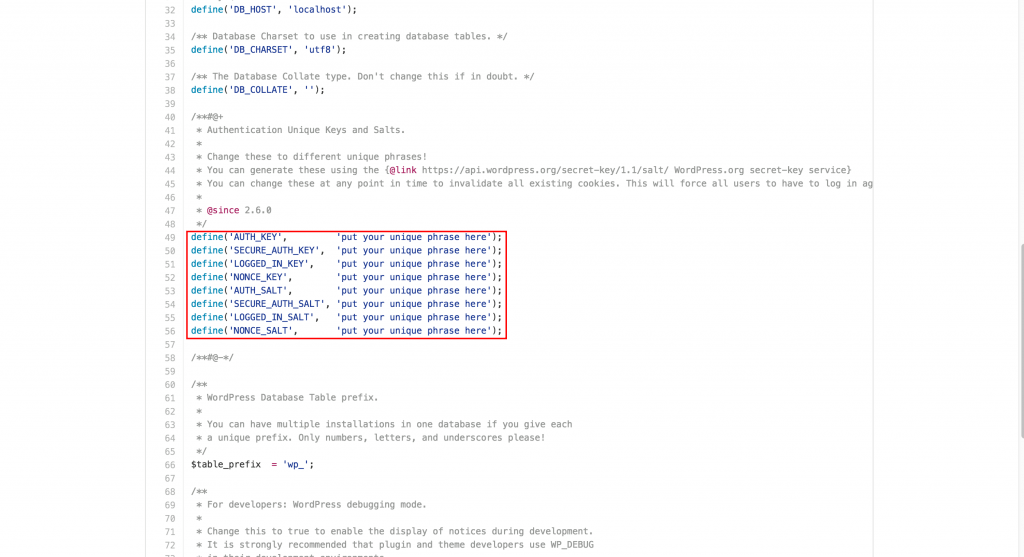
Replace default Unique Keys and Salts
With your wp-config-sample.php file still open in the Code Editor, navigate to the section that reads “*Authentication Unique Keys and Salts”. Copy URL and paste it to your browser. Copy the Unique Phrase and Salt Keys generated by the WordPress API and replace the default ones located in the wp-config-sample.php file. Once you are finished with that, hit “Save” and exit the Code Editor and return to the directory root.
Step 7:
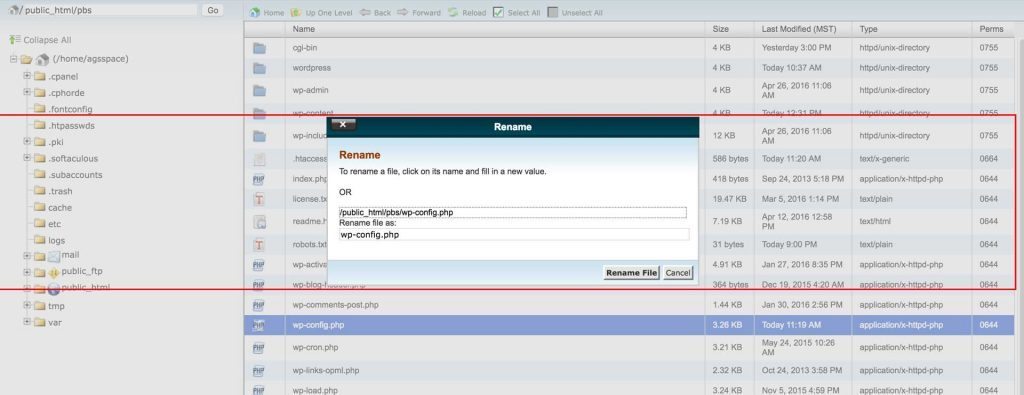
Rename “wp-config-sample.php” to “wp-config.php”
Now that you are back in the directory’s root, single click on the wp-config-sample.php file to highlight it. From there click on the “Rename” icon in the top toolbar and rename “wp-config.sample.php” to “wp-config.php”. Click the “Rename File” button and you’re all finished with this phase.
Step 8:
Run the WordPress Installation Script
At this point you are all finished with the cPanel portion of this process… congrats!
Now it is time to run the WordPress Installation Script, you will be brought to a page with the URL “https://example.com/wp-admin/install.php”. Replace the “example.com” with the address of the website you are creating. Hit Return/Enter on your keyboard and the install process will begin.
Once you have arrived at the next screen, select the language of choice for your WordPress install and click “continue”.
You will then be brought to a page prompting you to enter all of your website’s pertinent information such as the site title, your username, your password, and email address. If you are developing a new site at this address, it may also be a good idea to tick the box “Discourage search engines from indexing this site” so Google, Bing, etc. don’t index your site before it is populated with content and ready to launch.
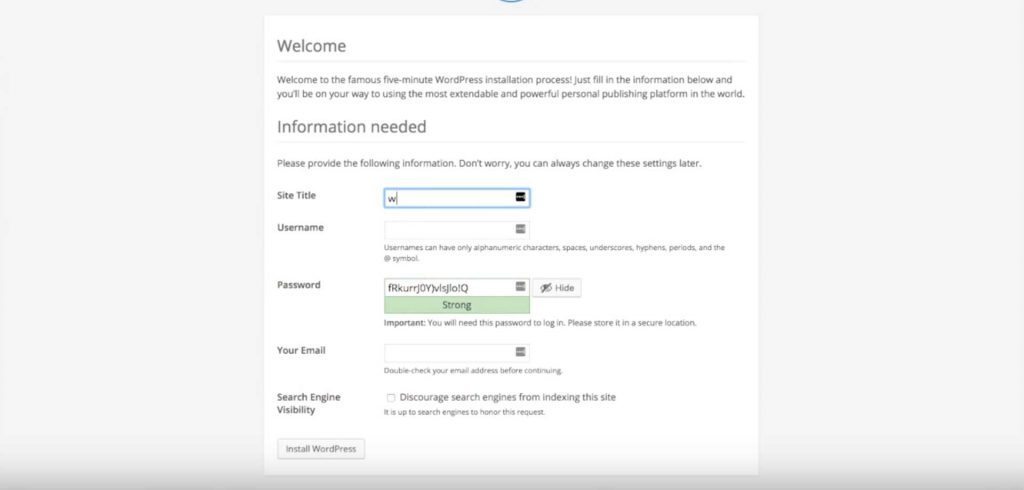
Once you have filled in all of the information, hit “Install WordPress” and you are all finished! You will be asked to log in to your new site with your provided username and password and you can now begin to build your masterpiece.
This is for personal documentation purposes.
THANK YOU!
Comments
Post a Comment