Fix Task Scheduler failed to start, Event ID 101
If you schedule a task using Task Scheduler and the task failed to start and is logged as Event ID 101, on your Windows 11/10 client PC or on Windows Server, then you are at the right place! In this post, we will identify the most likely culprit, as well as provide the suitable solutions you can apply to resolve the issue.

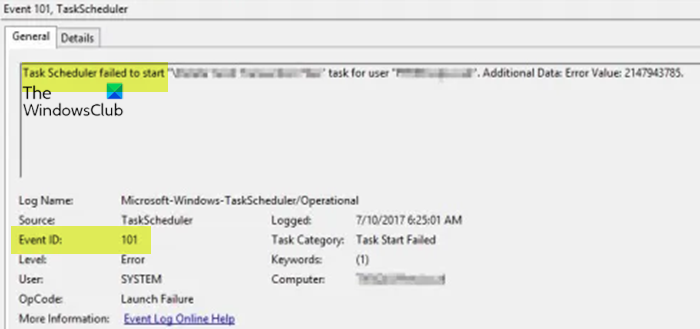
Task Scheduler failed to start “\Task Name” task for user “Domain\username”. Additional Data: Error Value: 2147943785.
Task Scheduler failed to start, Event ID 101
If your schedules task fails to run and you see the Task Scheduler failed to start with Event ID 101 in Event Viewer, you can try our recommended solutions below in the order presented below to have the issue promptly resolved on your machine.
- Add user to ‘Log on as a batch job’ group
- Make sure Task Scheduler service is set to Automatic and running
- Delete and recreate the Task
Let’s have a quick look at the description of the listed solutions.
1] Add user to ‘Log on as a batch job’ group

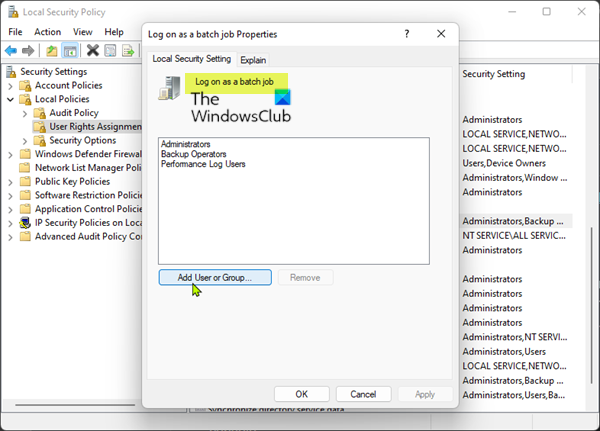
The main culprit to the Task Scheduler failed to start – Event ID 101 on Windows 11/10 client machine or Windows server was revealed to be permissions-related. The applicable fix here is to simply add the user to the “Log on as a batch job” property on the server or client machine as the case may be. To perform this task, do the following:
- Press Windows key + R to invoke the Run dialog.
- In the Run dialog box, type secpol.msc and hit Enter to oprn the Local Security Policy console.
- In the console, on the left navigation pane, click Local Policies to collapse the section.
- Now, click User Rights Assignment.
- On the right pane, double-click on Log on as a batch job policy to edit its properties.
- In the Properties window, click the Add User or Group button to add the appropriate username to the group.
- Finally, click Apply > OK to save changes.
- Exit Local Security Policy console.
Next time the job runs, it should run successfully without issues.
Read: Task Scheduler not running or starting programs
2] Make sure Task Scheduler service is set to Automatic and running

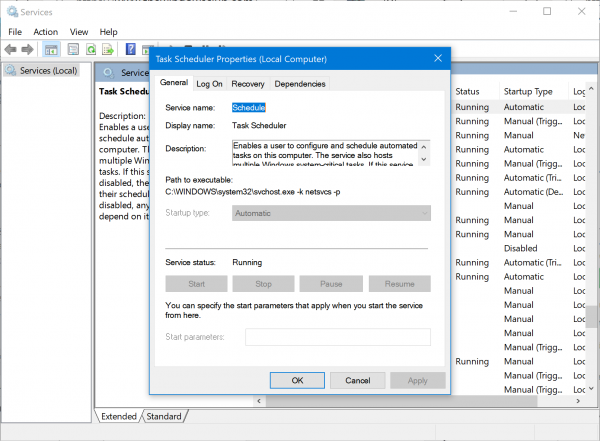
It’s possible the issue you are currently facing is due to the Task Scheduler service is disabled and not running or not set to automatic startup which is the default setting on your machine. To rule out this possibility, you need to make sure Task Scheduler service is set to Automatic and running. To perform this task, do the following:
- Press Windows key + R to invoke the Run dialog.
- In the Run dialog box, type services.msc and hit Enter to open Services.
- In the Services window, scroll and locate the Task Scheduler service.
- Double-click on the entry to edit its properties.
- In the properties window, click the drop-down on the Startup type and select Automatic.
- Next, make sure the service is started by clicking the Start button if not greyed out.
- Click Apply > OK to save changes.
- Restart PC.
If this service is set to automatic and running but the issue in hand persists, try the next solution.
Read: System error 1058 has occurred, The service cannot be started
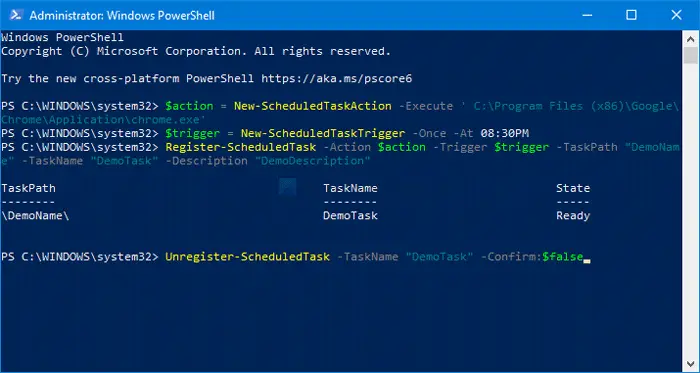
3] Delete and recreate the Task

Before you do this, you can try running the task manually in Task Scheduler and see if the job runs successfully. You can refresh the history of the tasks by pressing F5 or clicking the refresh button. If it fails to run manually you can troubleshoot it from there until it does run manually. Otherwise this solution as a last-ditch effort requires you to delete the scheduled task if the task is not too complicated and then rec
Comments
Post a Comment