
GoodSync Best and Simple Sync Application Tutorial


GoodSync automatically synchronizes and backs up all your photos, music, email, and other important files between all your desktops, laptops, servers, and external drives.


Download Link: https://www.goodsync.com/download

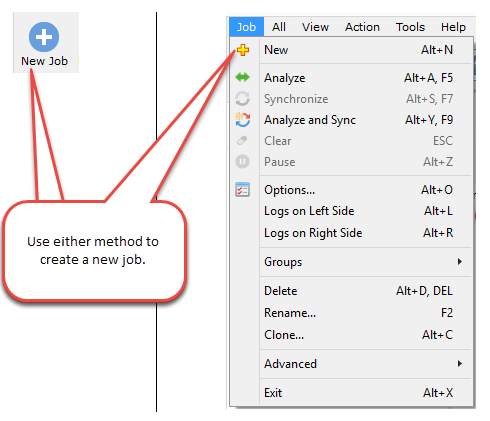
How to Create a New Job

  1. On the Job menu select New, or click the New Job Button in the toolbar

    Create a New Job
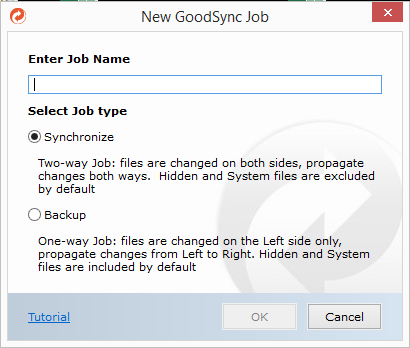
  2. On the New GoodSync Job prompt:

    1. Enter the Name for your new Job.

    2. Select Backup or Synchyronize as your Job Type.

    New Job Name
  3. Click the Left Browse button. Choose the Left Folder for your new Job.

    Select Left Folder
  4. Click the Right Browse button. Choose the Right Folder for your new Job.

    Select Right Folder
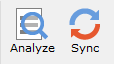
  5. Click the Analyze button and review the proposed changes.

    Analyze Your Files
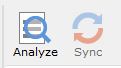
  6. Click the Sync button.

    Sync the Changes

Your Files Are Now Synchronized! — Yes, it's that Easy!


How to Enable Automatic Settings - Set it and Forget it!

There are a variety of automatic settings you can choose. You only need to set up your synchronization job once and GoodSync will automatically synchronize your files according to your preferred schedule/settings.

  1. Select Options from the Job menu.

    Job Options
  2. Select the Auto section.

    Automatic Job Settings
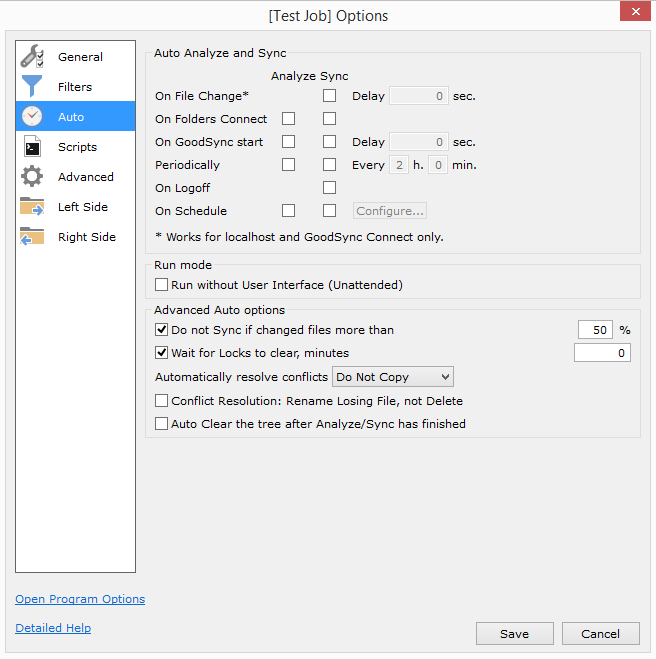
  3. Set the specific Automated settings as desired.

GoodSync will now automatically synchronize your files based on your settings.

Comments

Popular posts from this blog

Add Printer: Windows cannot connect to the printer. FIXED!

  Fix Windows Cannot Connect to the Printer Issue. Easily! 1. Search "Registry Editor" 2. Locate Computer\HKEY_LOCAL_MACHINE\SYSTEM\CurrentControlSet\Control\Print and right-click select  New > Key  >  "DWORD (32-bit) Value" 3. Rename the file to  RpcAuthnLevelPrivacyEnabled 4. Right Click select " Modify..." 5. Make sure the Value name is correct " RpcAuthnLevelPrivacyEnabled" Value Data is 0  and the Base is Hexadecimal and click  OK . And now follow the steps below to stop the Print Spooler service  and then start it again. 1. Press Win+R (Windows logo key and R key) at the same time. A Run dialog box will open. Type services.msc in the run box and click OK button. 2. In the Name list, locate and double-click on services  Print Spooler . 3. Click Restart. Congratulations! 

Remote Desktop Services session timeout Setup in RD Session Host in Windows Servers

  If you face a session time-limit policy issue that gets disconnected in the meantime. You can follow the steps below in order to fix the issue, By default, the user’s RDP session in Windows may stay disconnected until the user or administrator terminates, or the computer is restarted. However, it is quite convenient since a user may connect to his old RDP session and go on working with running programs. In order to terminate disconnected RDP/RDS sessions automatically in a specified time period, you need to set session limits (time-outs) correctly. If you are using an RDS server, you will have to configure session time-out parameters from the RDS collection settings in the Session tab menu. You will have to Specify the time period after which you want to disconnect the RDP session. Lastly, a disconnected session option (by default, a session period is unlimited – Never). Thus, you can set the maximum duration of an active session (Active session limit) and end an idle session (Id...

How to add your Source Code to GitHub

Quick setup  — if you’ve done this kind of thing before  Set up in Desktop or HTTPS SSH Get started by  creating a new file  or  uploading an existing file . We recommend every repository include a  README ,  LICENSE , and  .gitignore . …or create a new repository on the command line echo "# bms" >> README.md git init git add README.md git commit -m "first commit" git branch -M main git remote add origin https://github.com/xxxxxxxxx/bms.git git push -u origin main …or push an existing repository from the command line git remote add origin https://github.com/xxxxxxxxxx/bms.git git branch -M main git push -u origin main -------------------------------------------------------------------------------------------------------- Proper steps to add existing code to GitHub The proper way to push a new project into an existing GitHub repository follows these steps: Create a GitHub repository for the existing project. Copy the GitHub URL for th...